If you’re fed up with your dirt bike chain’s lackluster performance and grimy residue, we have just the solution for you!

In this article, our experts will reveal to you their proven method on how to clean a dirt bike chain in order to ensure optimal performance and longevity.
Not only will we reveal the step-by-step process, but we’ll also share some insider tips that will take your chain maintenance game to the next level. Ready to transform your dirt bike experience? Keep reading to unlock the full potential of your bike!
Gathering the right tools and materials before beginning the chain cleaning process is essential for an efficient and effective experience. Having the appropriate equipment readily available will not only save time but also help you achieve the best results.
Quick Navigation
What are the tools needed to clean a dirt bike Chain?
Here’s a list of the essential tools and materials for cleaning your dirt bike chain:
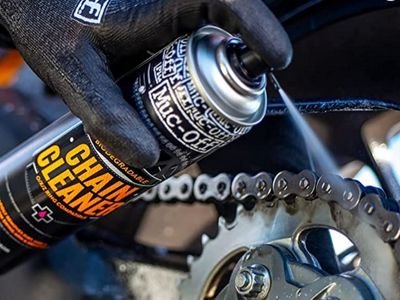
- Chain cleaner or degreaser: You need a good cleaner or degreaser for your bike chain. It should be biodegradable so it won’t hurt the environment. There are special cleaners made just for bike chains, but you can also use a general-purpose degreaser that works just as well. (We recommend the Muc Off Motorcycle Chain Cleaner)
- Grunge brush or toothbrush: A grunge brush is a special brush just for cleaning chains. It has strong bristles to scrub the chain. If you don’t have one, use a toothbrush with hard bristles instead. Make sure your brush has no dirt on it before you use it to clean your chain.
- Clean rags or towels: When you are cleaning a chain, it is important to have some clean towels or rags. Microfiber cloths are great because they absorb and don’t leave any lint behind. Have a few on hand so you always have one ready to use.
- Chain lubricant: After thoroughly cleaning your chain, it’s essential to apply lubricant in order to reduce friction and protect against rust. There are many lubes available on the market – choose one that works best for your particular riding style and conditions.
- Rubber gloves: Cleaning a dirt bike chain can be very messy. Wear rubber gloves to keep your hands clean and safe from dirt, grease, and chemicals. Nitrile gloves are a good choice because they stop chemicals better than latex. They also do not tear as easily as latex gloves.
- Protective eyewear: When you are cleaning your chain, wear safety glasses or goggles. This will keep your eyes safe from any cleaner or degreaser that might splash up. Wearing the right protection will help you stay focused on the job without worrying about getting hurt.
- Bike stand or alternative method to elevate the bike: To safely clean the bike chain, elevate your bike’s back wheel off the floor. A dirt or lift stand is ideal for this task, but you can also use a block of wood or another stable surface to support it. Prioritize security by ensuring that your bicycle is firmly held in place before beginning any cleaning so as to avoid injury and possible destruction of components.
How to clean a dirt bike chain – Step-by-Step Guide
In this section, we will provide a detailed, step-by-step process for cleaning your dirt bike chain. Following these steps will ensure thorough cleaning, resulting in optimal performance and extended life for your chain and sprockets.
Step 1: Prepare the bike and work area
- Set up your work area in a well-ventilated space, preferably outdoors or in a garage.
- Use a bike stand or an alternative method to elevate the bike, ensuring that the rear wheel is off the ground and the chain can move freely.
- Put on rubber gloves and protective eyewear to safeguard your hands and eyes during the cleaning process.
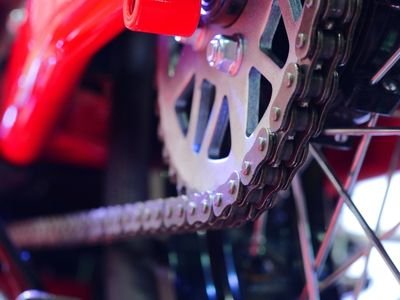
Step 2: Inspect the chain for initial wear or damage

- Before cleaning, examine the chain for visible wear, damage, or improper alignment. If you notice any issues, make a note to address them after the cleaning process.
Step 3: Apply the chain cleaner or degreaser
- Generously spray the chain cleaner or degreaser onto the entire chain, making sure to cover all links and rollers. Alternatively, you can pour the cleaning solution into a container and use a brush to apply it to the chain.
- Allow the cleaner to soak into the chain for a few minutes, as per the manufacturer’s instructions, to help break down the dirt, grime, and old lubricant effectively.
Step 4: Scrub the chain with a grunge brush or toothbrush
- Begin scrubbing the chain using a grunge brush or toothbrush with firm bristles. Start at one point of the chain and work your way around, making sure to clean both the inner and outer surfaces, as well as the rollers and side plates.
- While scrubbing, rotate the rear wheel to help move the chain along and ensure that all sections are thoroughly cleaned.
- Apply additional chain cleaner or degreaser if needed, and continue scrubbing until the chain appears clean and free of dirt and grime.
Step 5: Rinse the chain with water (optional)
- To clean your bike chain, use a water-soluble cleaner. Put it on the chain from the top to the bottom. Then rinse off any leftover dirt or solution with a hose and gentle water stream. Make sure that no water goes into the wheel bearings or other parts of your bike!
- If you used a non-water soluble cleaner or would prefer not to rinse, then move on to the following step.
Step 6: Wipe down the chain with a clean rag or towel
- Thoroughly scrub the chain, then use a clean and dry rag or towel to remove any residual dirt, grime, and cleaning solution. To do this efficiently and effectively begin at one point of the chain before taking time to rotate the rear wheel as you progress all around it.
- Keep on wiping down the chain until it is completely dry and devoid of any gunk. This step is critical to get rid of all moisture, thereby avoiding rusting or corrosion.
Step 7: Inspect and adjust chain tension
- After cleaning, check the chain tension to ensure it is within the manufacturer’s recommended range. Adjust the tension if necessary, following your bike’s owner’s manual for guidance.
- You may also want to check the chain alignment with a chain alignment tool or by visually inspecting the sprockets’ alignment. Proper alignment helps prevent uneven wear and ensures smooth operation.
Step 8: Apply chain lubricant
- Once the chain is clean and dry, apply a high-quality chain lubricant specifically designed for dirt bikes. Hold the lubricant nozzle or spray can close to the chain and apply a steady, even layer of lubricant to the entire chain, focusing on the rollers and inner surfaces.
- Rotate the rear wheel as you apply the lubricant to ensure that all sections of the chain are evenly coated.
Step 9: Wipe off excess lubricant
- After lubricating the chain, let the lubricant penetrate for a few minutes as per the manufacturer’s instructions. Then, use a clean rag or towel to gently wipe off any excess lubricant from the outer surfaces of the chain; this step helps prevent the accumulation of dirt and grime during your next ride.
- Be careful not to remove too much lubricant from the chain, as it still needs adequate lubrication for proper functioning.
Step 10: Reinspect the chain and surrounding components
- Once you have cleaned and lubricated the chain, make sure to check it over one last time. Look for damage, sprockets that are not lined up correctly, or signs of too much wear. Fix any problems before you ride your dirt bike.
- Check the parts that are near the bike, like the sprockets, swingarm, and chain guard. If they are dirty, wipe them off.
Step 11: Test the bike
- Take the dirt bike off the stand. Turn on the engine and test it by sifting through all of the gears. Listen carefully for any strange noises or problems with the chain or other parts.
Step 12: Clean up and dispose of waste materials
- Finally, clean up your work area, disposing of used rags, brushes, and any excess cleaning solution in a responsible manner, following local regulations and guidelines.
By following these steps, you can effectively clean your dirt bike chain, ensuring optimal performance, safety, and longevity for your bike.
Regular chain maintenance is a crucial aspect of dirt bike ownership, so be sure to perform this process as needed based on your riding conditions and habits.
Tips on how to maintain your dirt bike chain
Proper maintenance is crucial to extend the life of your dirt bike and ensure a safe and enjoyable riding experience.
Here are 4 essential tips to help you take care of your dirt bike:
1. Regularly clean and lubricate the chain:
As we’ve discussed in this article, keeping the chain clean and well-lubricated is vital for optimal performance and longevity. Regularly inspect the chain for dirt, grime, and wear, and follow the cleaning and lubrication process outlined above.
The frequency of chain maintenance depends on your riding conditions and habits, but a general rule of thumb is to clean and lubricate the chain after every few rides or when visibly dirty.
2. Check and change the engine oil:
Engine oil plays a critical role in keeping your dirt bike’s engine running smoothly and preventing overheating.
Regularly check the oil level and quality, and change the oil according to the manufacturer’s recommendations or at least once per riding season. Be sure to use the appropriate oil type and viscosity specified in your bike’s owner’s manual.
3. Keep an eye on the tires:
For a safe and enjoyable dirt bike ride, the tires’ condition is of utmost importance. Examine your wheels for signs of wear and tear as well as any damage.
Should it be necessary to replace them due to excessive aging or harm, make sure you do so without hesitation!
Additionally, inflate your tires with enough air in accordance with what the producer suggests; this will ensure that you have maximum grip and control when riding.
4. Periodically service the suspension:
A well-maintained suspension system is essential for a comfortable and controlled ride. Regularly inspect the forks, shock absorbers, and other suspension components for signs of wear, leaks, or damage.
Keep the suspension components clean and free of debris, and have them serviced periodically according to the manufacturer’s recommendations.
This may include changing fork oil, replacing seals, or adjusting the suspension settings to suit your riding style and preferences.
Conclusion
In conclusion, properly cleaning and maintaining your dirt bike chain are vital aspects of overall bike care.
By following the detailed guide and maintenance tips we’ve provided, you can ensure a smooth and efficient ride while extending the life of your chain and sprockets. A well-maintained dirt bike not only enhances your riding experience but also keeps you safe on the trails.
Remember, regular maintenance and timely inspections are key to preventing potential issues and keeping your dirt bike in top condition. So, invest the time and effort in maintaining your bike, and enjoy the rewards of a reliable, high-performing dirt bike for years to come.
Frequently Asked Questions (FAQs)
How often should I clean and lubricate my dirt bike chain?
It is important to clean and lubricate your chain often. It depends on how much you ride, the weather, and what kind of ground you are riding on. A good rule of thumb is to clean and lubricate your chain every few rides or when it looks dirty or dry.
Can I use household items like WD-40 or dish soap to clean my dirt bike chain?
Using household items like WD-40 or dish soap to clean your chain is not the best idea. These products may not work as well as a cleaner or degreaser made for chains. They also might not provide the right amount of lubrication and protection.
Do I need to remove the chain from my dirt bike to clean it properly?
You don’t need to take off the chain from your bike every time you clean it. This is only necessary for special maintenance.

Paul's love for motorcycles started at a young age, and he spent most of his teenage years tinkering with bikes in his garage. As he grew older, his passion for motorcycles only intensified, and he began exploring different types of motorcycles and taking long road trips to different parts of the country.
- Unveiling the Honda Ruckus Top Speed and its Thrilling Performance - June 20, 2023
- Unveiling the Mystery: What is a Bobber Motorcycle? Unleash the Essence of Raw Power and Timeless Style! - May 26, 2023
- Maintenance Tips for Your Enduro Electric Bike: Essential Guide for Optimal Performance - May 23, 2023